

File Submission Guidelines
Most artwork provided to Mcleods Printing is in the form of an electronic file of your print communication piece. This is frequently created using an industry-standard desktop publishing programs such as Adobe Creative Suite or Quark Xpress. One of the biggest issues in processing of electronic files by Mcleods Printing is that they are all too often not print ready. To help avoid electronic files that can’t be processed, please follow the checklist below:
INCLUDE BASIC FILE INFORMATION
When submitting the file, include the name and version number of the program used to create the artwork (ex: Adobe Creative Suite 6, or Quark Xpress 5.0). Include the file name, finished size, and page count including cover. All of these are basic checks our prepress department will use to make sure we are working with the correct file. Having this information upfront saves time by answering the most basic questions.
INCLUDE FONTS
Include all the fonts that are used in the piece. Mcleods Printing will not be able to see or use your selected fonts if they are not included in the file. Most desktop publishing programs have an option to include or embed fonts when you create a PDF of your file; this is our preferred file format. In some graphics programs, text can be converted to outlines or curves. Doing so ensures that your text remains intact even if we don’t have your font on file. Text is no longer editable once this is done, so make sure you’ve checked your spelling.
INCLUDE IMAGES
Include linked images on your printed piece. Linked images are the images for a piece that must be linked to the area of the project and saved with that project. We are not able to see images that are not linked.
OBSERVE SAFE AREA, TRIM, & BLEED
Trim size should be the same as the final printed size. Bleeds are used if you need your printed piece to have color to the edge of the page. Bleeds should be exactly 1/8″ over the final finished size. Extend any background colors or design elements all the way to the bleed edge, 1/8″ outside the trim line. To be at full bleed, the design must extend to the edge of this bleed area. This ensures that an unwanted white border is not shown after the document is cut.
To avoid having text or images cut off during trimming, please keep all important information within the safe area. This is generally 1/8” inside the trim line. See the diagram below for a sample layout.
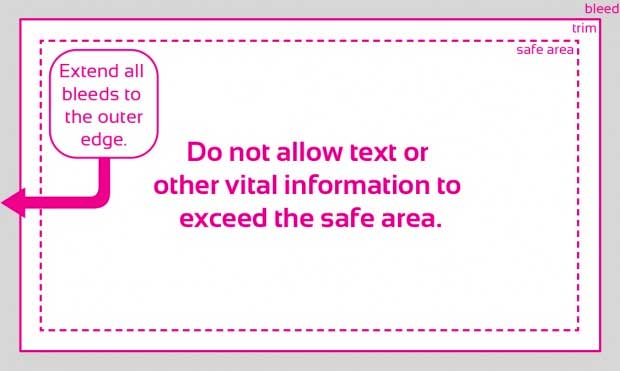
DIAGRAM SHOWING BLEED, TRIM, AND SAFE AREA.
When your document has a fold, honor a safe area on either side of the fold line as well. This will keep your important information from falling into the fold when the piece is finished.
INCLUDE NAMES OF SPOT COLORS
Include all unique colors (PMS Colors), and the spot color names and number. Include those numbers in an email or in the file.
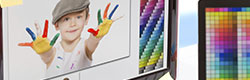
SAVE FILES IN CMYK FORMAT
Artwork is frequently created in RGB so that you can view it on your computer monitor. CMYK is the full color process system that we use to create the high quality, vibrant colors of offset printing. If your software allows color profiles, use “CMYK: Web Coated (SWOP) v2” to view the most accurate representation of your final printed colors.
CREATE HIGH-RESOLUTION ART
Make sure your project is saved at 300 dpi. Many times pictures that you took off the Internet or pictures that you have scanned will not be 300 dpi. 300 dpi is the minimum image resolution that is recommended to deliver clear and vibrant pictures. Pictures that are less than 300 dpi will be fuzzy and unclear.
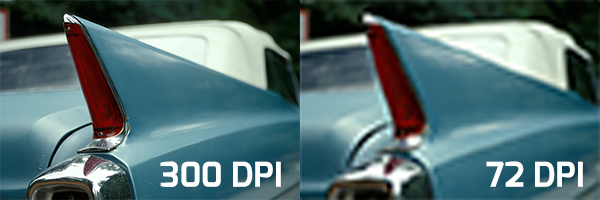
IMAGES BELOW 300 DPI MAY NOT REPRODUCE WELL.
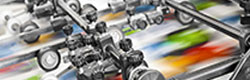
It is best to use vector graphics when possible as opposed to raster or bitmap images in your designs. They are able to retain high image quality at any size. Raster images are composed of tiny dots called pixels. Pixels placed close together fool our eyes into seeing a continuous area of color. When you need gradients or photographs, raster images are generally your best option for this reason. However, because they contain a fixed number of dots, a disadvantage of raster images is that when you enlarge a raster image, their ability to fool the eye suffers. There may be more space between the dots and the dots get larger. Raster images should be used in printing as close to 300 DPI (dots per inch) as possible. Lower resolutions may result in “pixelation” or fuzzy images, as seen above.